If you’re a lover of wildlife, inviting a more varied population of birds into your yard is always a goal. Owls, with their natural pest-control abilities, are an often-overlooked friend to the garden, plus they’re cool and fun to watch. Setting up a safe nesting area for owls can help attract owls to your outdoor space, so here’s what you need to know.
Owls can eat up to 12 mice in one night of hunting, making them a practical as well as fun addition to a garden space. If you have issues with pests eating veggies or other plants in your yard, owls are a natural option to help keep your garden safe without the use of traps or poisons.
When considering an owl’s nest box for your yard, keep in mind that some species of owl are territorial, especially when they have young, so keeping their nest at a safe distance from entrances and pathways is a good idea. Even generally less territorial species might perform a dive bomb maneuver if they think their nest is threatened.
To build an owl’s nest box, begin by choosing what size box you need. If the native owls to your area are small, you’ll need an eight- or 10-inch box, but larger owls can require a box as tall as 38 inches to nest. Checking in with your local university extension or Audubon society for recommendations on local sizing is a good step to take before choosing the size of your box.
For your owl box, you’ll need:
Once you’ve chosen the height, width, and depth of your box, you will also need to create an entrance to the box, just as with any bird house, that will accommodate the largest owl you plan to attract. For larger owls, like barn owls, the opening should be about seven inches square. Smaller owls can use an opening as small as four inches square.
Using the example of a barn owl box as a starting point, I’ll describe how to build the box, and you can adjust your measurements as needed for smaller owl species. The finished box should measure 38 by 18 by 12 inches on the inside, with a square, seven inch opening on the front. If you’re handy, you can make a fancier entrance shape using a jigsaw—there’s no rule against it—but for simplicity’s sake, let’s say the opening is square here.

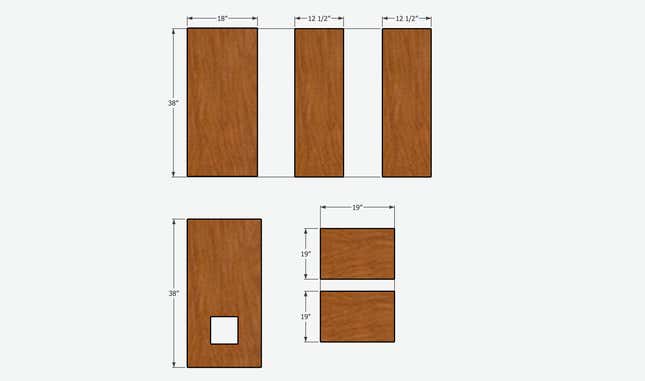
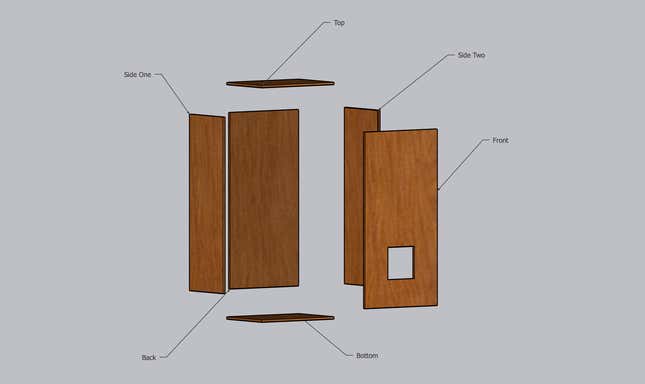
Begin by cutting the largest side, the back panel of your box. For a barn owl, the back panel should measure 38 inches by 18 inches. Then you can cut two sides, measuring 38 inches by 12 inches plus the thickness of the boards. If your board is a half inch thick, the sides will measure 38 inches tall by 12 ½ inches wide. This allows for the overlap of the side pieces with the back panel. Then, cut your top and bottom pieces at 13 inches by 19 inches so that they overlap with the sides and the front and back panels. Finally cut a piece for the front that is 38 inches tall by 19 inches wide. On this panel, measure up from the button six inches, then mark out a seven by seven inch square on center at six inches. Use a jigsaw to cut out the hole.


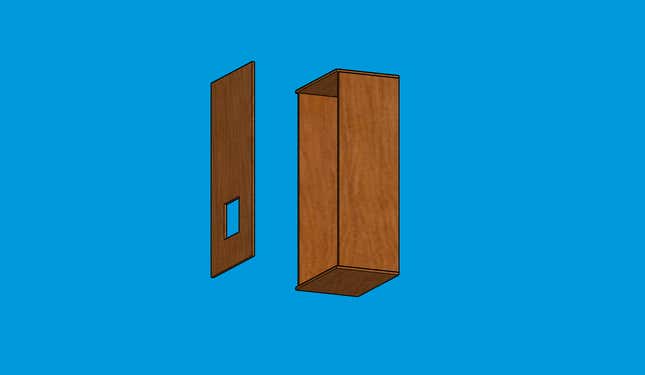
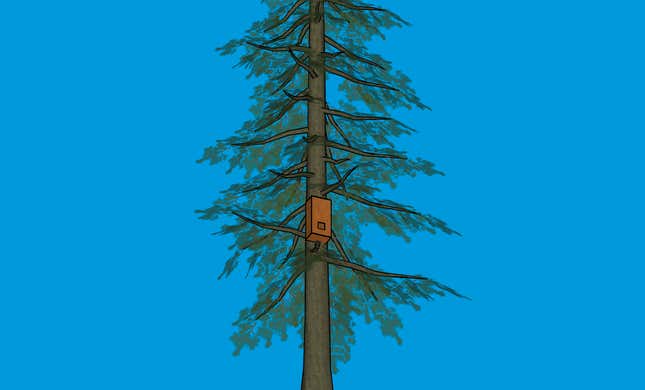
Then assemble your pieces. In most cases, it will be easier to attach your box if you put together the back, top, bottom, and sides first, place your box on a sturdy post, up in a tree, or in another sturdy structure, and then attach the front so that you have access to screw or nail the box in. If you don’t want to attach the front in place, you can use hanging hardware instead. You can also opt to use hanging hardware that doesn’t require you to drill through the back of the box.

